The math that rules Full HD GIFs
1080p means 1920 by 1080, a resolution designed for a format with real motion compression behind it. GIF has none. It caps every frame at 256 colors and writes the pixels out more or less as-is, so a full-resolution Full HD GIF balloons past what chat apps, docs, and most patience can handle. Keeping all 1920 pixels of width buys you a file nobody can receive.
Here is what makes the problem easy: GIFs are displayed small. A chat bubble, a README, a slide, an embedded doc, all of them render the image at a few hundred pixels across. Shrink the output to the size it will actually be seen at and you give up nothing visible while shedding most of the weight. If your end goal is the tiniest possible file rather than a sensible one, the small GIF from video page pushes the same levers further.
Choose the output frame on purpose
Bring the clip to the converter; Full HD MP4 and MOV decode cleanly in every current browser, so the preview and timeline come up in seconds with nothing sent anywhere. Then go straight for the scale control and pick a width for the destination: 480 for chat and forum posts, 600 to 640 for docs, READMEs, and email templates, 720 when a UI walkthrough has small text that must stay legible. Cutting width from 1920 to 480 leaves you about one sixteenth of the pixel area per frame, which is why this single control does more than everything else combined.
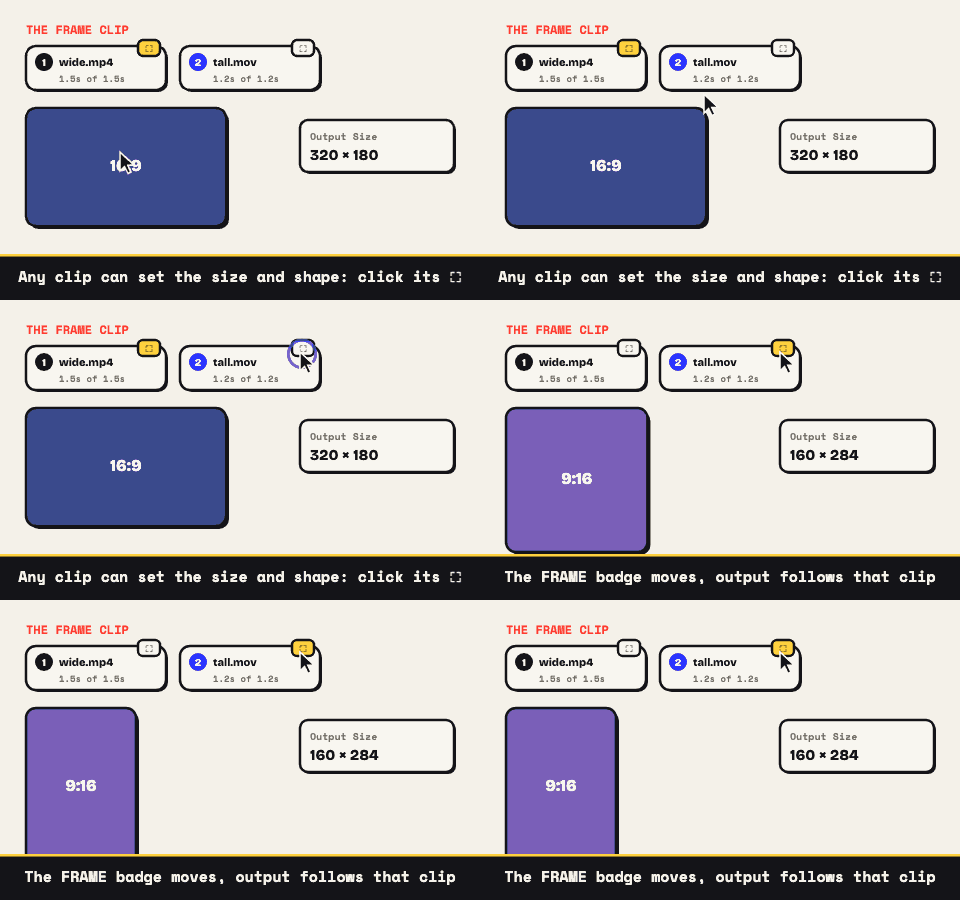
If you are sequencing several clips into one GIF, the output frame belongs to exactly one of them: whichever clip carries the FRAME toggle, the first clip by default. Hand the toggle to a different clip and the whole GIF adopts that clip's size and aspect, with the preview reframing instantly so you can judge the change before you commit.
Trim, then frame rate, then palette
With the width set, cut the clip to the two to five seconds that carry the idea. Drag the timeline handles to mark the loop, then walk either handle frame by frame with the arrow keys until the join lands cleanly. After that, drop the frame rate to the 10 to 15 fps band (fast action can justify more, most footage cannot) and bring the palette down to between 64 and 128 colors with a little dithering. The projected size refreshes the moment you touch any of these, so every tradeoff shows its price immediately.
The order matters: trim, scale, frame rate, colors. The first two are heavy machinery, the last two are fine tuning. Working backwards wastes effort on settings the big levers would have made irrelevant.
Why the downscale actually looks better
There is a happy accident in shrinking Full HD: condensing 1080p worth of detail into fewer pixels disguises the 256-color ceiling, so a downscaled GIF frequently looks cleaner than a full-size one built from the same palette. When you need to protect quality, spend your budget on resolution and clip length rather than starving the colors, because an over-crushed palette is what makes a GIF read as cheap. Note that the trick only works downhill: upscaling a small source invents no detail, so the scale control here only ever needs to move downward. The high quality video to GIF guide covers the whole balancing act dial by dial.
On your machine, start to finish
The decode, the preview, and the encode all run inside the tab. Your Full HD file is never transmitted, queued, or stored on anything you do not own, and the finished GIF downloads directly with no watermark on it. There is no size quota to negotiate either, since the only hardware involved is yours. Convert when the preview looks right, and the file is yours to post.